Introduction
Web apps have a graphical user interface that runs inside a web browser and a companion server app that runs on (or as) a web server. You can also create web apps that function as web services by utilizing the HandleURL event on the App object.
Web project overview
When you create a web project, you get the following project items added automatically:
App: The App object allows you to specify some initial app settings, including
Session: Each user that connects to the web app gets its own Session instance. Use the Session object to save information that is specific to the user/session and to access session-specific information.
WebPage1: This is the main window layout where you place your controls. You can add your own web pages as well.
App Object
For a web project, the App object is a subclass of WebApplication. You use it to specify the default web page that opens when your app starts and a session connects, default messages, HTMLHeader and the app icon (in various sizes).
Event Handlers
The WebApplication class for a web app has event handlers. They are:
Closed: The Closed event is called when the app quits.
HandleURL: This event fires when an http request comes to your app which would otherwise result in a 404 Page Missing response.
Opening: This event handler is called when your app first starts.
UnhandledException: Called when a runtime error occurs that is not caught by your code. This event gives you a “last chance” to catch runtime errors before they cause your app to quit.
Properties
DefaultPage: This is the web page that is displayed automatically when the app starts.
HTMLHeader: Can be used to add static HTML code to each page.
Icon: This opens the Icon Editor and lets you specify the various size icons that are used by the app. These icons are used by the loading screen and as the browser favicon. This is a design-time-only property.
Design considerations
Keep these things in mind when designing and developing your web apps.
Client/Server
All web apps use a client/server design. This means that a web app has two parts: the client user interface and the app that runs on the server. The client is the part that the user interacts with. For a web app, this is the user interface that runs in a web browser. Web apps support recent versions of modern web browsers such as Safari, Chrome, Firefox and Internet Explorer.
The app is where your Xojo code runs and it is typically run on a server. The client and the web app components can reside on the same computer, but they are usually different computers: the user's computer for the web browser/user interface and a server that is running the app.
Latency
When you are testing your web apps locally, both the client (web browser) and server (app) are running on your computer. This means that communication between them is quick. But when you deploy an app to a web server, there can be a longer delay as the web browser has to communicate across the Internet to the app on the server. This delay is called latency and has a lot of factors, including the speed of the user's Internet connection, general Internet congestion and the responsiveness of the server.
It is important when designing your app to keep latency in mind, by not designing your UI as if it expects fast (desktop-like) responsiveness.
Multiple users and sessions
A web app typically has multiple users connected to it at one time. This is handled for you using a concept called Sessions. The Session object is a subclass of WebSession and is automatically added to all web projects. Each user that connects to your web app gets its own Session subclass that you can access using the Session global function.
Use the Session object to store information that is global to the connected session, but not global to the overall app.
Cookies
Cookies are a browser feature that allows the web browser to save Session-specific data. Web apps have built-in support for Cookies as methods of the WebSession class.
Cookies are a standard way for web browsers to retain information pertaining to a session. For example, if your web app has users log in using a UserID, you could save the UserID as a cookie. The next time they open the web app, you can ask the web browser for the cookie and if it is available, pre-fill the UserID name for them.
This is how you set a cookie value:
Session.Cookies.Set("UserName", "BobRoberts")
A cookie without an expiration date will expire the moment the web session ends. To set the expiration date, pass in a DateTime object.
This cookie will expire in one year:
Session.Cookies.Set("UserName", "BobRoberts", DateTime.Now.AddInterval(1))
This is how you retrieve a cookie value:
Var userName As String
userName = Session.Cookies.Value("UserName")
Hashtags
Hashtags are a way for you to identify different areas of the web app. Web apps always show the same browser URL, even as you navigate to different web pages. You can use the hashtag as a way to identify different pages (or data) so that the user can return directly to it later.
Hash tags are written using the “#” character like this:
http://www.mywebsite.com/#details
http://www.mywebsite.com:8080/#settings
The WebSession event is called when the hashtag is changed by the user. In this event, you can get the new value and choose to navigate to a different page or display different data. For example, you can send the hash tag #50 to display row 50 in a ListBox with code like this:
Var row As Integer
row = Hashtag.Val - 1

Var dataList As WebListBox = MainPage.DataList
If row >= 0 And row <= dataList.RowCount Then
  dataList.SelectedRowIndex = row
End If
This is an example of a URL for the above code:
http://127.0.0.1:8080/#50
More simply, this code in the HashtagChanged event displays a settings page when the URL "http://127.0.0.1:8080/#settings" is used:
If Hashtag = "settings" Then
  SettingsPage.Show
End If
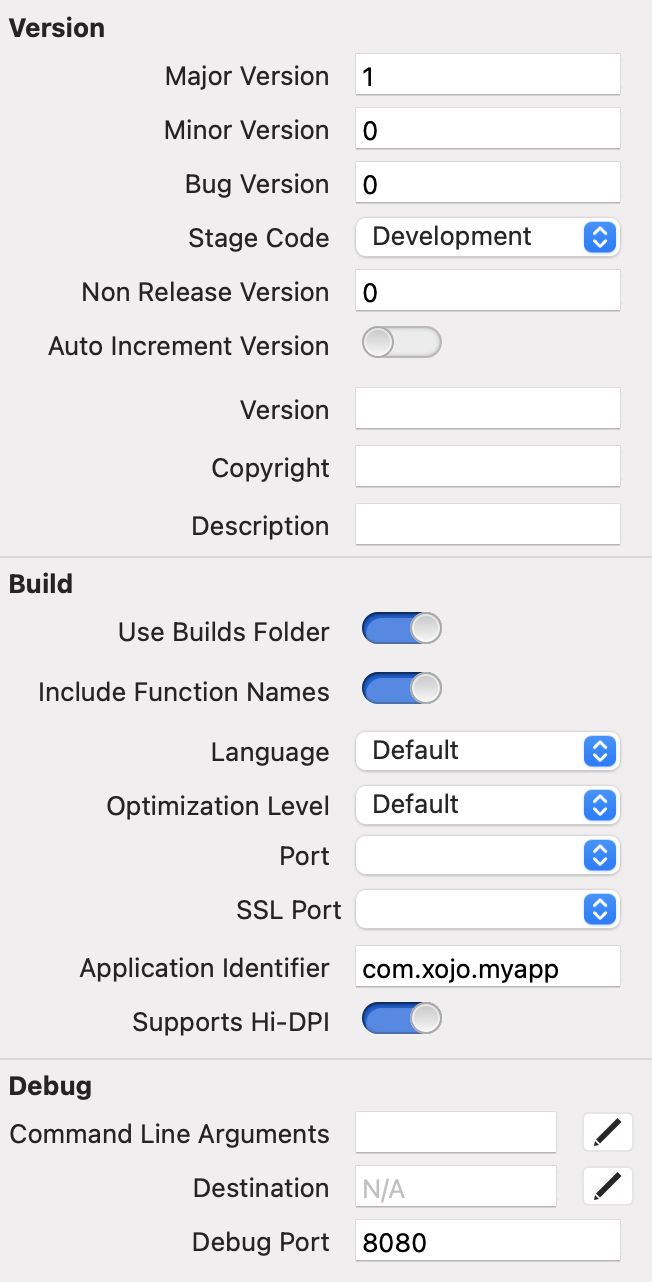
Build Settings
The Build Settings section of the Navigator contains the build-specific settings for your app in general and for specific OS targets. You can check the box next to each target in order to build an app for that target. Web targets are: Windows, macOS and Linux.
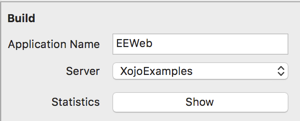
Xojo Cloud

The Xojo Cloud section is used to deploy your web app to a Xojo Cloud server.
Application Name: The name of your web app. Your web app will be deployed into a folder with this name, which will be of the URL to the app.
Server: The Xojo Cloud server to which to deploy. You will need to have purchased a Xojo Cloud server and be logged in to your account in Xojo in order to see your servers.
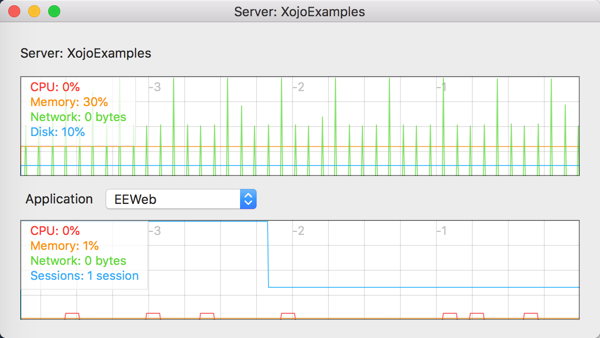
Statistics: Click the Show button to display a window of statistics for the entire server and individual apps that are installed on it.
Last URL: The previously assigned URL for accessing this app from a browser.
Domain Name: The full domain or subdomain used to access this app from a browser.

macOS
The macOS section allows you to specify settings for the macOS web app.
Mac App Name: The actual file name for the macOS app.
Architecture: The CPU architecture for the app. Choices are x86 64-bit, ARM 64-bit and Universal.
Bundle Identifier: This is the same as the Application Identifier.
Windows
The Windows section contains build settings for your Windows web apps.
Windows App Name: The actual file name for the Windows app.
Company Name: The “Company Name” appears in the Copyright section of the app properties in the Details tab.
Product Name: The name of the product as installed in the Windows Start > All Programs menu. This also appears in “Product name” on the app properties Details tab.
Internal Name: This is useful when your product has a different internal name than its external name. This is not shown on the app properties Details tab.
File Description: [TBD]
Include Windows Runtime DLLs: Copies the Universal Runtime DLLs beside your app executable. For more information, refer to Windows Universal Runtime.
Architecture: The CPU architecture for the app. Choices are x86 32-bit, x86 64-bit and ARM 64-bit. The default is x86 64-bit.
Linux
The Linux section contains build settings for your Linux web apps.
Linux App Name: The actual file name for the Linux app.
Architecture: The CPU architecture for the app. Choices are ARM 32-bit, x86 32-bit, x86 64-bit, ARM 64-bit.
Linux ARM apps run on the Raspberry Pi and other similar single-board computers.
Deployment
The easiest way to deploy your Xojo Web apps is to use Xojo Cloud. With Xojo Cloud, you can deploy your web app in a single step by clicking the Deploy button on the main toolbar. Xojo Cloud also adds many additional features which are covered here:
Should you prefer to deploy to your own servers, you can also do so as a standalone app. You create a build by clicking the Build button on the main toolbar or choosing Project > Build from the menu.
For more information about web app deployment:
